Step 01 - Procuring Components
Since these are electronic components, review the specs available in the table above. If you find parts that have specifications near the ones mentioned above, don't hesitate using them.
| Item | Component | Link & Price |
|---|---|---|
| 1 |
Electronic Speed Controller (ESC) Current: 30A Battery Range: 2-3 Lipo |
India - Amazon Price - ₹500 ($6.67) |
| 2 |
Lithium Polymer Battery Style: 360mAh LiPo Cell Count: 2-3 Voltage: 11.1 V Max Continuous Discharge: 30C |
India - Amazon Price - ₹795 ($10.60) |
| 3 |
Digital Multi Servo Tester Style: Servo & ESC |
India - Amazon Price - ₹237 ($3.16) |
| 4 |
Brushless DC Motor KV: 1400 Battery: 3S LiPo |
India - Amazon Price - ₹500 ($6.67) |
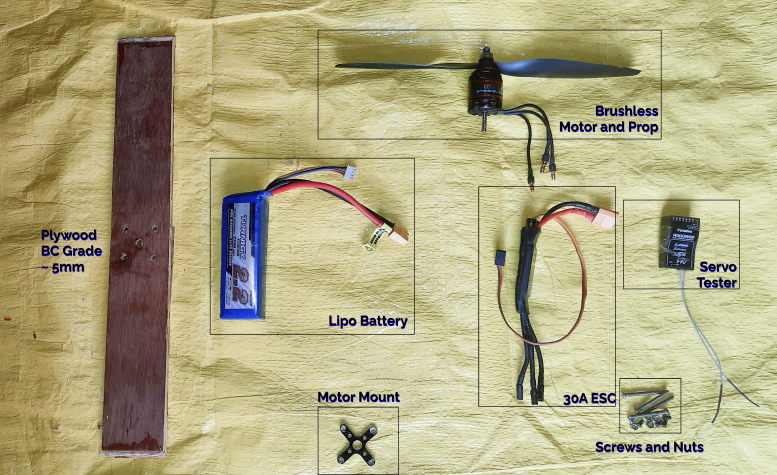
Power Pod Components
Step 02 - Mounting the Motor
- Cut a piece of 3mm ply-wood to a height of 15.5" and width of 3".
- Find the motor mount that comes with the brushless motor.
Trace the mount's holes in the middle of the ply-wood strip. - Drill the traced holes. The middle hole must have a diameter of 6mm, allowing the motor axle to spin freely. The four mounting holes must have a diameter of 4mm.
- Attach the mount to the motor - screws are given with the motor to fasten the mount.
Screw the mounted motor to the plywood using the holes we've drilled earlier. use nuts on the other end to properly secure the mount.
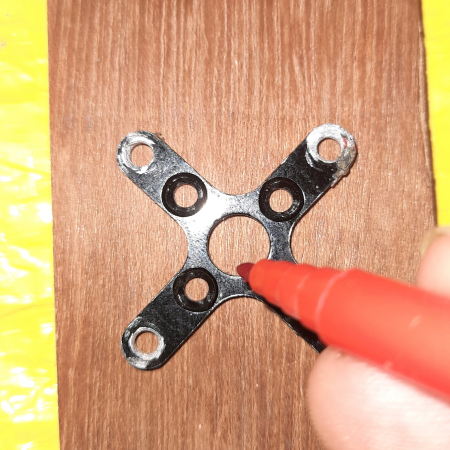
Tracing the Motor Mount
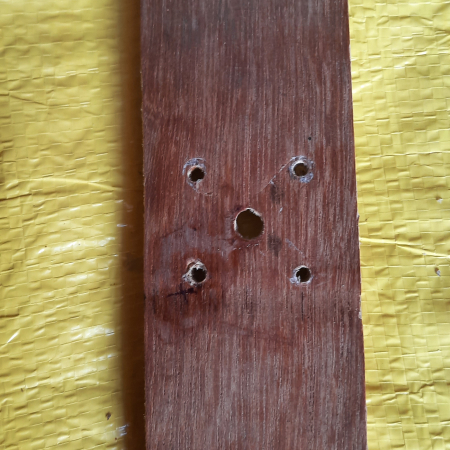
Drilling Mount Holes into the Ply
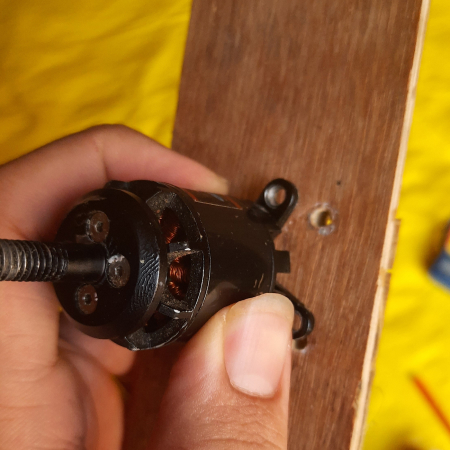
Attaching Motor to Mount and Ply
Step 03 - Joining the electronics and securing them
Connect the bullet connectors on the motor to the ESC's bullet holes.
Connect the ESC's JR Connector to the Servo Tester. The knob on the servo tester will control the power to the motor.
When you're running the motor, connect the other end of the ESC to the battery. At all other times, the connection to the battery must not be made.
The electronics must be secured to the rear of the plywood strip, away from the face of the motor. Orientations vary according to the length of your wires. An example is shown in the image. Once you've found the orientation, secure the components with fibre-glass tape - make sure nothing is in line of the propeller.
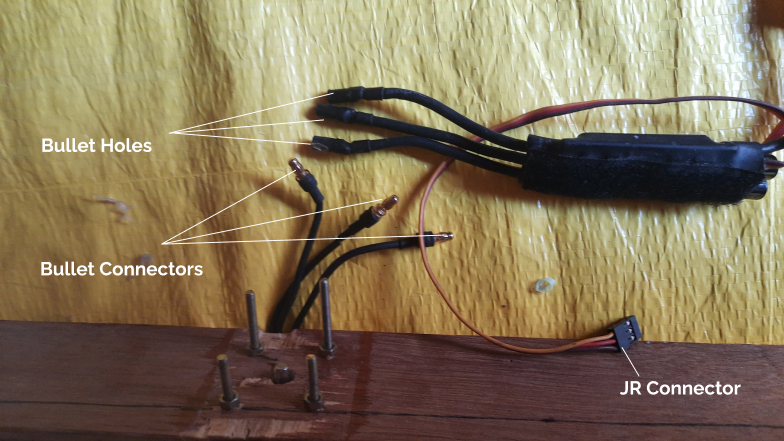
Electronic Component Connections
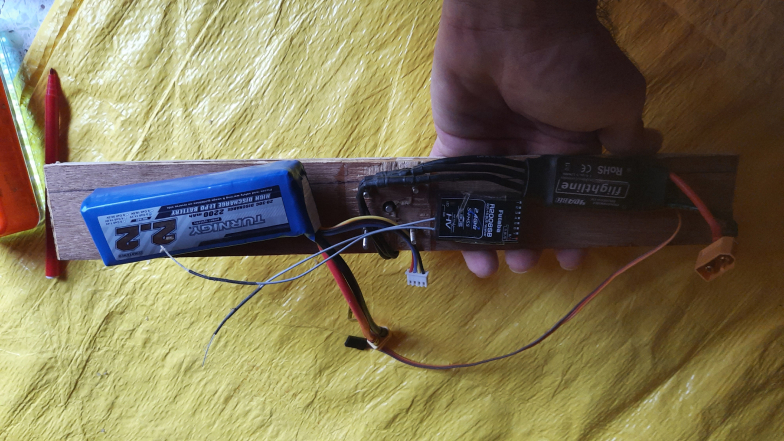
Power Pod Electronics Orientation
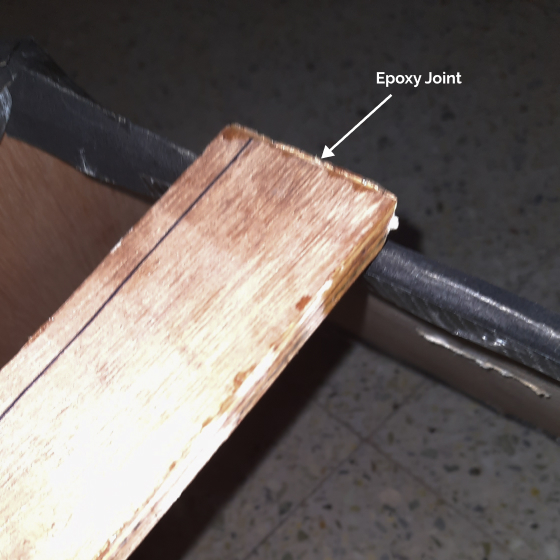
Step 04 - Mounting Power Pod to Diffuser
This is a fairly straight forward step. To the plywood strip, apply epoxy at the ends that touch the outlet walls of the diffuser. Gluing materials with epoxy takes a couple of steps. Hold the power pod in position until it dries. Test the motor on low power and make any adjustments if required.